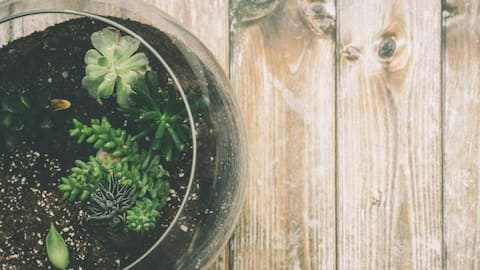
DIY terrariums: Green magic in a jar
What's the story
Terrariums, are self-sustaining mini-greenhouses, requiring minimal care yet offering a unique and aesthetically pleasing alternative to traditional plants. Comprising stones, soil, charcoal, plants, and a touch of personality, crafting your terrarium is a quick, affordable, and low-maintenance endeavor, with only occasional watering and care throughout the year. Here are some pointers for creating and caring for your terrarium.
Step 1
Select a container
The first essential for crafting a terrarium is selecting a container. You have the freedom to choose almost any clear container or glass jar with a wide enough opening for your chosen plants. Popular options include aquariums, goldfish bowls, and mason or pickle jars. Get creative and repurpose something from around the house or explore your local thrift store for unique finds.
Step 2
Pick plants
Explore your nearby garden center or nursery to discover plants that complement the size and shape of your chosen container. A diverse selection awaits, offering small potted houseplants like ferns, moses, fittonia, baby tears, pothos, lucky bamboo, and creeping fig. Opt for terrarium plants that boast a variety of foliage forms, ensuring an aesthetically pleasing and visually dynamic composition for your green creation.
Step 3
Add drainage layers
In terrariums without drainage holes, establishing effective drainage layers is crucial to prevent root rot. Begin by placing a two-inch layer of coarse gravel, sea glass, or beach stones at the container's base. Following this, use a large spoon to apply a quarter to a half-inch layer of activated charcoal over the gravel to inhibit fungi growth on the stones when they become wet.
Step 4
Add moss and potting soil
Place a layer of sheet moss and a potting mixture over the stones and charcoal to prevent the potting soil from mingling with the charcoal and stones. The combined base layer should occupy one-quarter to one-third of the container, allowing ample space for the plants to flourish as they grow. This strategic layering ensures a conducive environment for your terrarium plants' development.
Step 5
Add plants
Use your fingers or a big spoon to make holes in the soil for each plant. Then put the plants into these holes carefully, and gently press the soil around them. Make sure to cover the plants with about half an inch of soil on top. This helps them stay in place and provides a good environment for them to grow in your terrarium.
Step 6
Finishing touches
Here comes the fun part! Enhance your terrarium's appearance by adding a final touch with sundries like marbles, pebbles, sea shells, pearls, small figurines, gems, stones, wood, seeds and nut pods, colored gravel for extra style, and many other endless whimsical items of suitable size. This step allows you to express your creativity and make your terrarium uniquely yours.
Tips
Things to do
Choose open containers for cacti and plants that thrive in drier environments. Place the terrarium in a location with bright but indirect sunlight. If such a spot is unavailable, use a 100-watt light or fluorescent bulb, ensuring 16 to 18 hours of daily exposure. Be cautious with open terrariums to avoid overhydration; use a spray bottle. Closed terrariums typically require watering every four-five months.
